User Management
The User Management feature in bPass allows administrators to create, view, edit, and manage users within the system. This comprehensive guide will help you understand how to effectively manage users in your bPass password manager.
Overview
User Management provides administrators with the ability to:
- View all users in the system
- Create new user accounts
- Edit existing user information
- Activate or deactivate user accounts
- Delete users and their associated data
- Assign roles to users
Accessing User Management
To access the User Management section:
- Log in to your bPass admin dashboard
- Navigate to the User Management section from the main menu
- You'll see the User List page displaying all existing users
User List
The User List page displays all users in your system with the following information:
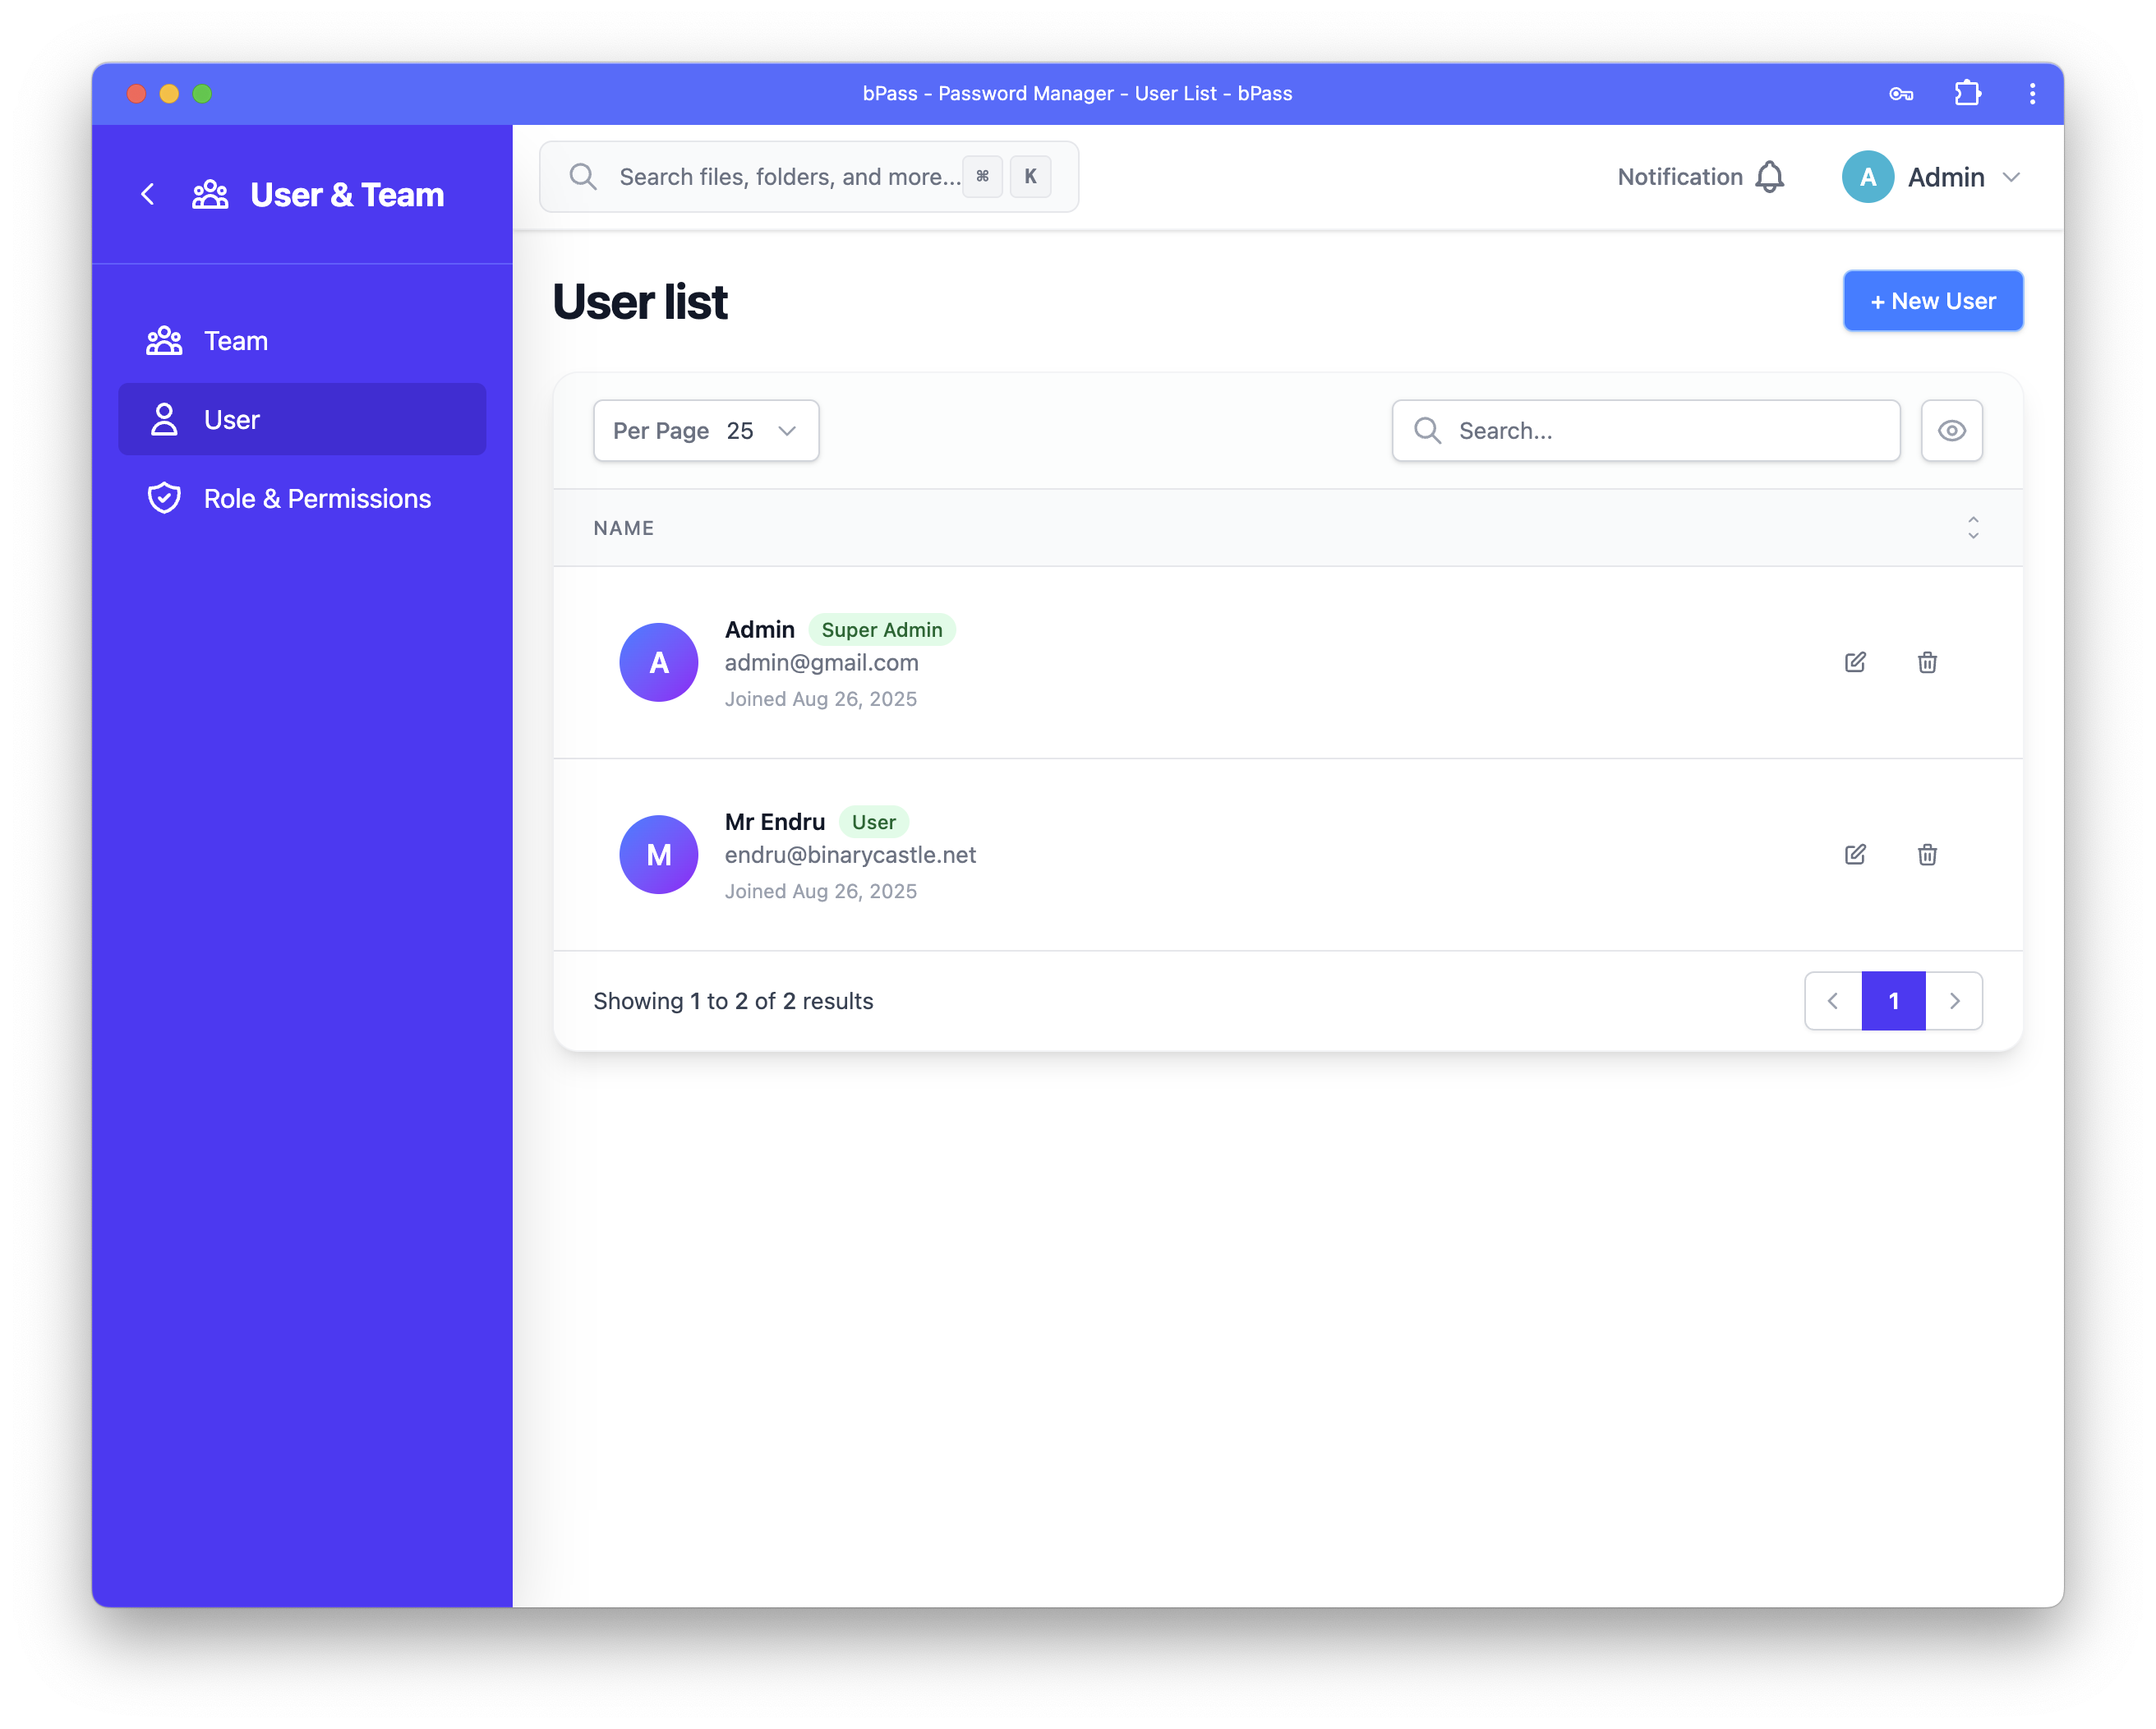
User Information Display
- Avatar: User's profile picture or initials if no picture is set
- Name: Full name of the user
- Email: User's email address (used for login)
- Role: User's assigned role (displayed as a badge)
- Join Date: When the user account was created
Available Actions
For each user, you can:
- Edit: Modify user information and settings
- Delete: Remove the user and all their associated data
Creating a New User
To create a new user account:
- Click the "+ New User" button on the User List page
- Fill in the required information:
Required Fields
- Full Name: Enter the user's complete name
- Email: Enter a valid email address (this will be their login username)
- Password: Create a secure password for the user
- Re-Type Password: Confirm the password by typing it again
- Role: Select an appropriate role from the dropdown menu
- Active Status: Check the "Active" checkbox to enable the account
Important Notes
- Password Security: Since bPass doesn't store user passwords in plain text, you'll need to share the password with the user through a secure channel
- Password Change Recommendation: It's strongly recommended that users change their password immediately after their first login
-
Active Status: Only active users can log in to the system
-
Click Submit to create the user account
Editing User Information
To modify an existing user's information:
- From the User List, click the Edit button (pencil icon) next to the user you want to modify
- Update the available fields:
Editable Fields
- Avatar: Upload or change the user's profile picture
- Full Name: Modify the user's name
- Active Status: Enable or disable the user account
Important Notes
- Email Changes: Email addresses cannot be changed through this interface for security reasons
- Password Changes: Passwords cannot be changed here - users must change their own passwords through their profile settings
-
Inactive Users: Unchecking the "Active" status will prevent the user from logging in
-
Click Save to apply the changes
User Account Status
Active Users
- Can log in to the system
- Have full access to their assigned features based on their role
- Can manage their password vault and entries
Inactive Users
- Cannot log in to the system
- Their data remains in the system but is inaccessible to them
- Can be reactivated at any time by an administrator
Deleting Users
Warning
Deleting a user is a permanent action that cannot be undone.
To delete a user:
- From the User List, click the Delete button (trash icon) next to the user
- A confirmation dialog will appear with the following warning:
"Deleting the user will delete all the entries associated with the user and there will be no way to retrieve it."
- Click Confirm to proceed with deletion or Cancel to abort
What Gets Deleted
- The user account
- All password entries belonging to the user
- All folders created by the user
- Any shared data owned by the user
Before Deleting
Consider the following alternatives:
- Deactivate Instead: Set the user as inactive to preserve their data while preventing access
- Transfer Data: If possible, transfer important entries to other users before deletion
- Export Data: Use the export feature to backup the user's data before deletion
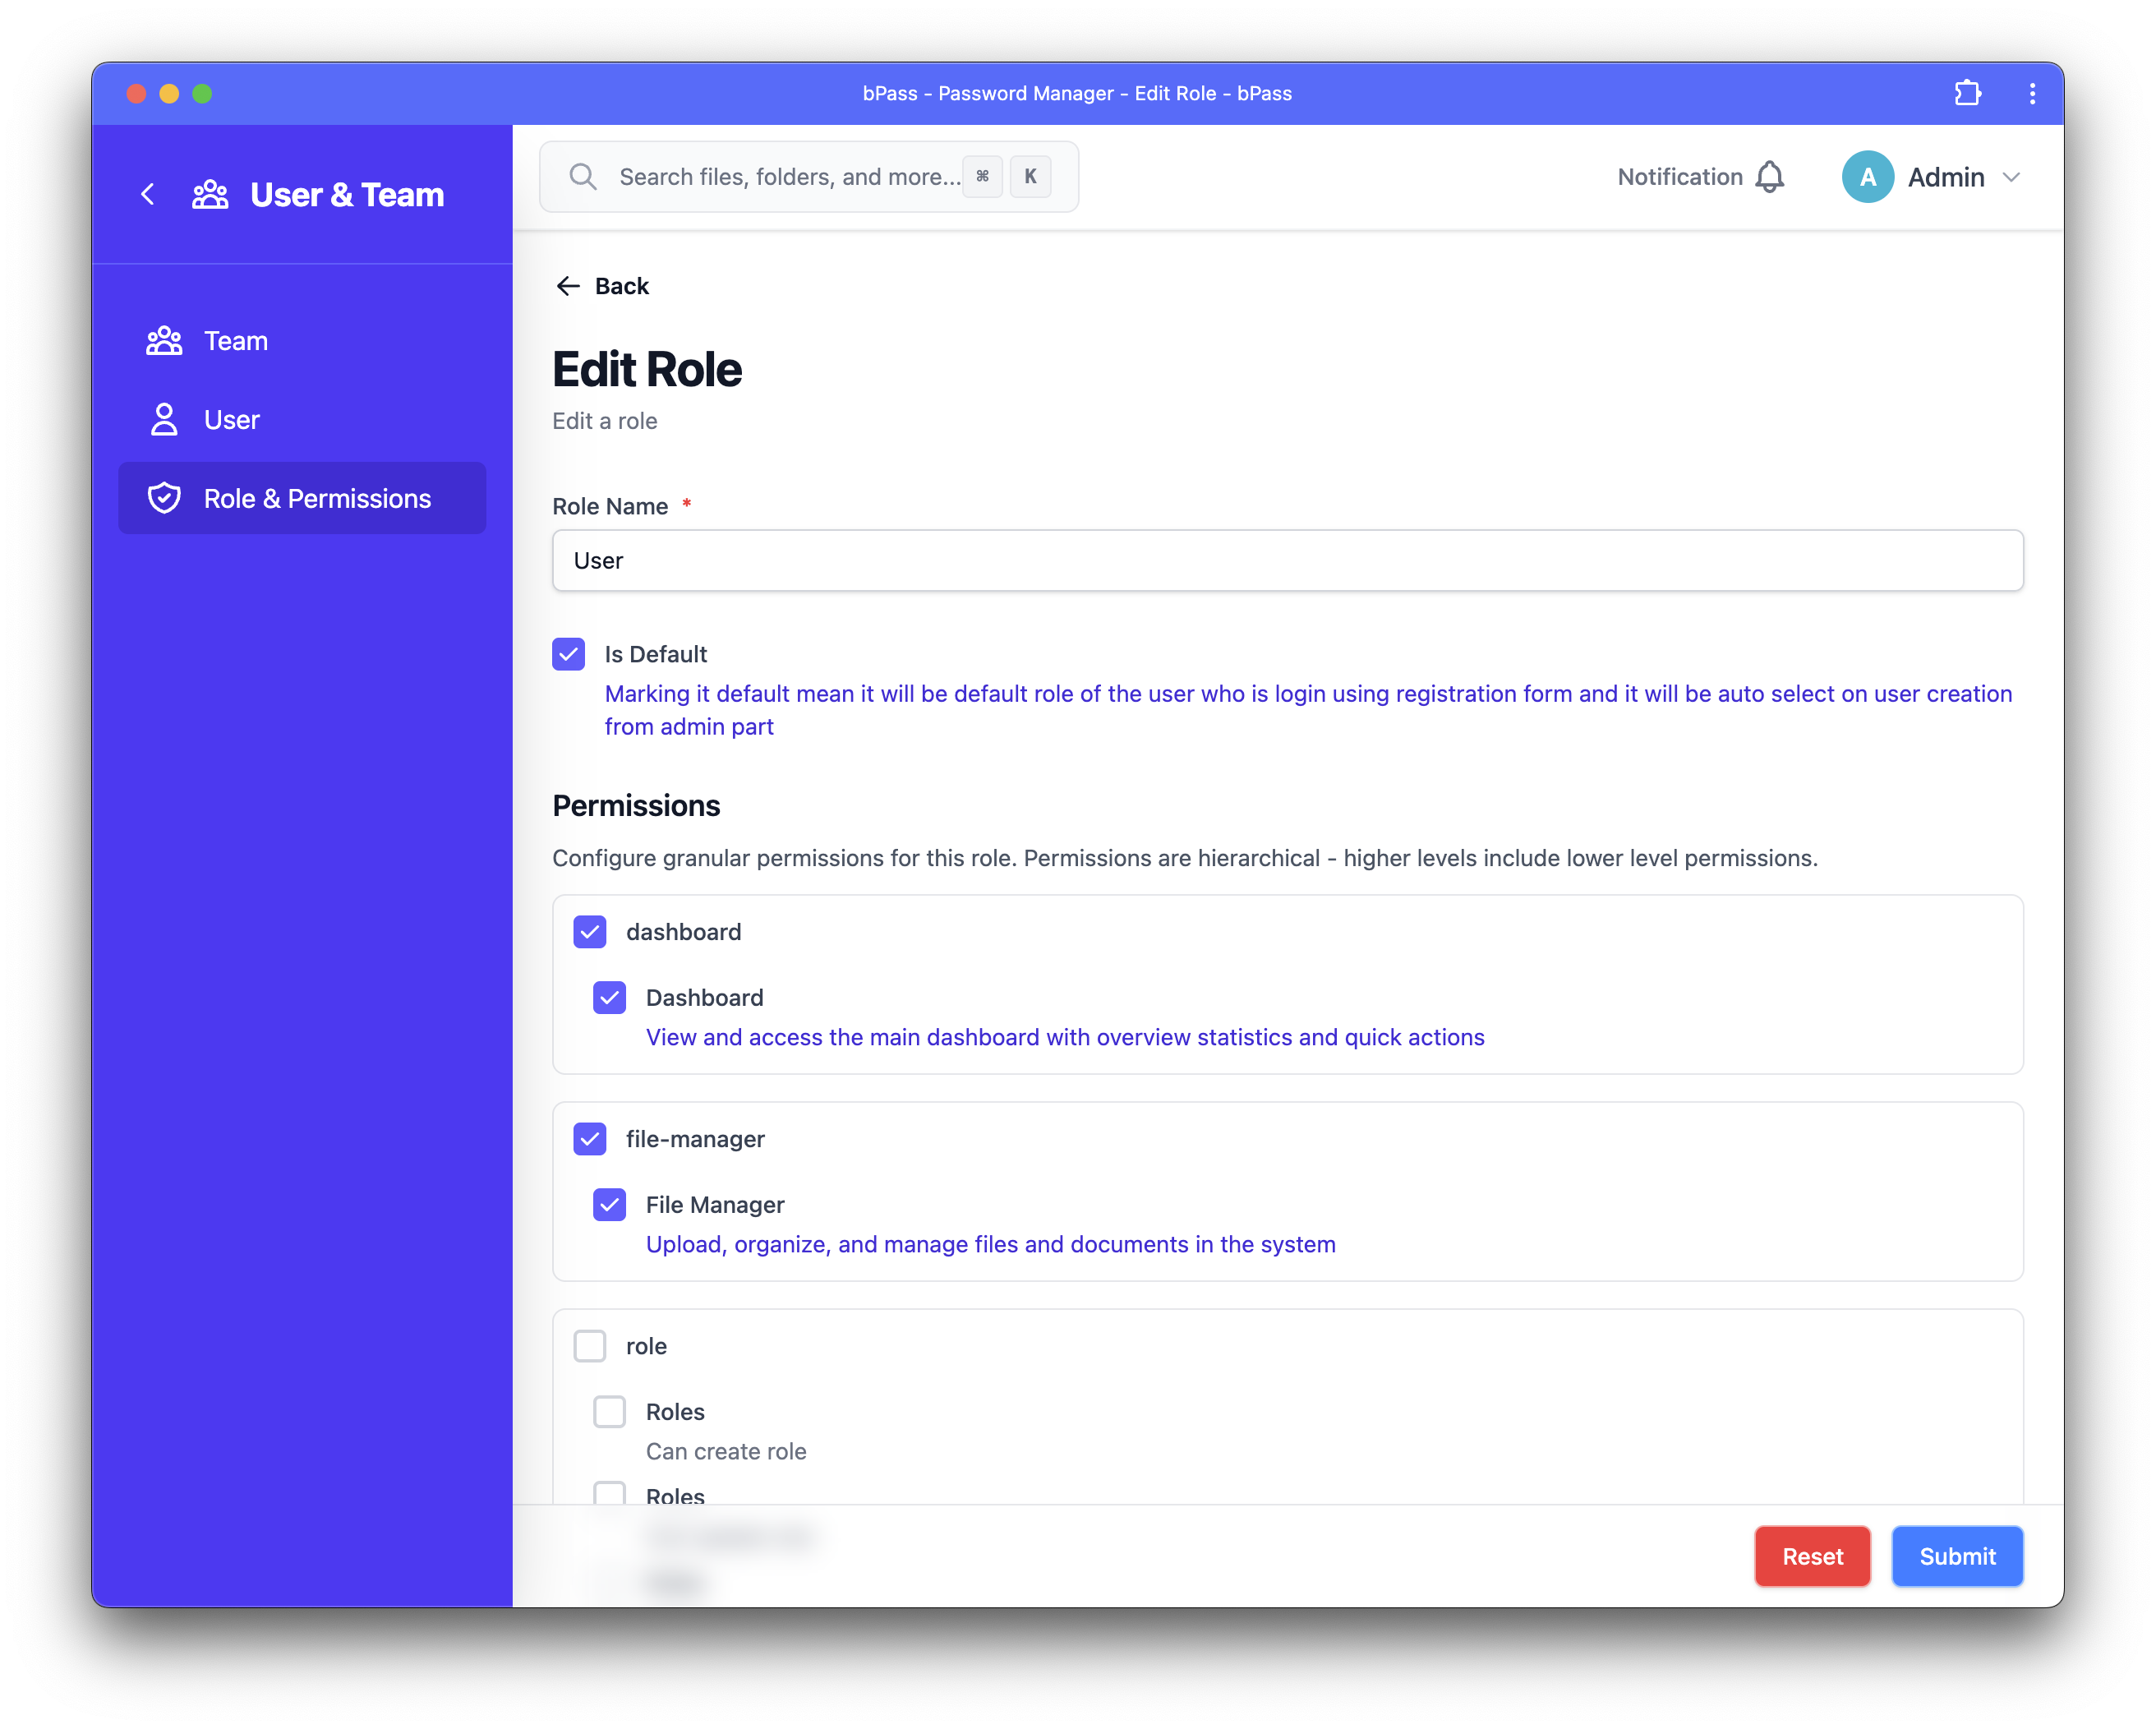
User Roles
Users must be assigned a role that determines their permissions within the system. Common roles include:
- Admin: Full system access and management capabilities
- User: Standard password management features
- Limited User: Restricted access to specific features
The available roles depend on your system configuration. For more information about roles, see the Role Management documentation.
Best Practices
Security Recommendations
- Strong Passwords: Always create strong, unique passwords for new users
- Immediate Password Changes: Instruct users to change their password after first login
- Regular Reviews: Periodically review user accounts to ensure only active employees have access
- Role Appropriateness: Assign the minimum necessary role for each user's job function
Account Management
- Timely Deactivation: Promptly deactivate accounts for users who no longer need access
- Data Backup: Export important data before deleting user accounts
- Communication: Inform users about their account details through secure channels
- Documentation: Keep records of who has access and their assigned roles
Troubleshooting
Common Issues
User Cannot Log In
- Verify the account is active
- Check if the correct email and password are being used
- Ensure the user's role has appropriate permissions
Missing User Data
- Check if the user account is active
- Verify the user hasn't been accidentally deleted
- Review any recent changes to user permissions
Role Assignment Issues
- Ensure the selected role exists and is properly configured
- Check if role permissions align with user needs
- Verify role assignment was saved correctly
Getting Help
If you encounter issues with user management, contact your system administrator or refer to the system logs for detailed error information.