Import Data
Easily migrate your existing passwords and sensitive data to bPass from popular password managers, browsers, and custom formats. The import system supports multiple sources and provides tools to organize and clean up your data during the migration process.

to start import password from other source navigate to settings → import
Supported Import Sources
Password Managers
Import directly from these popular password management services:
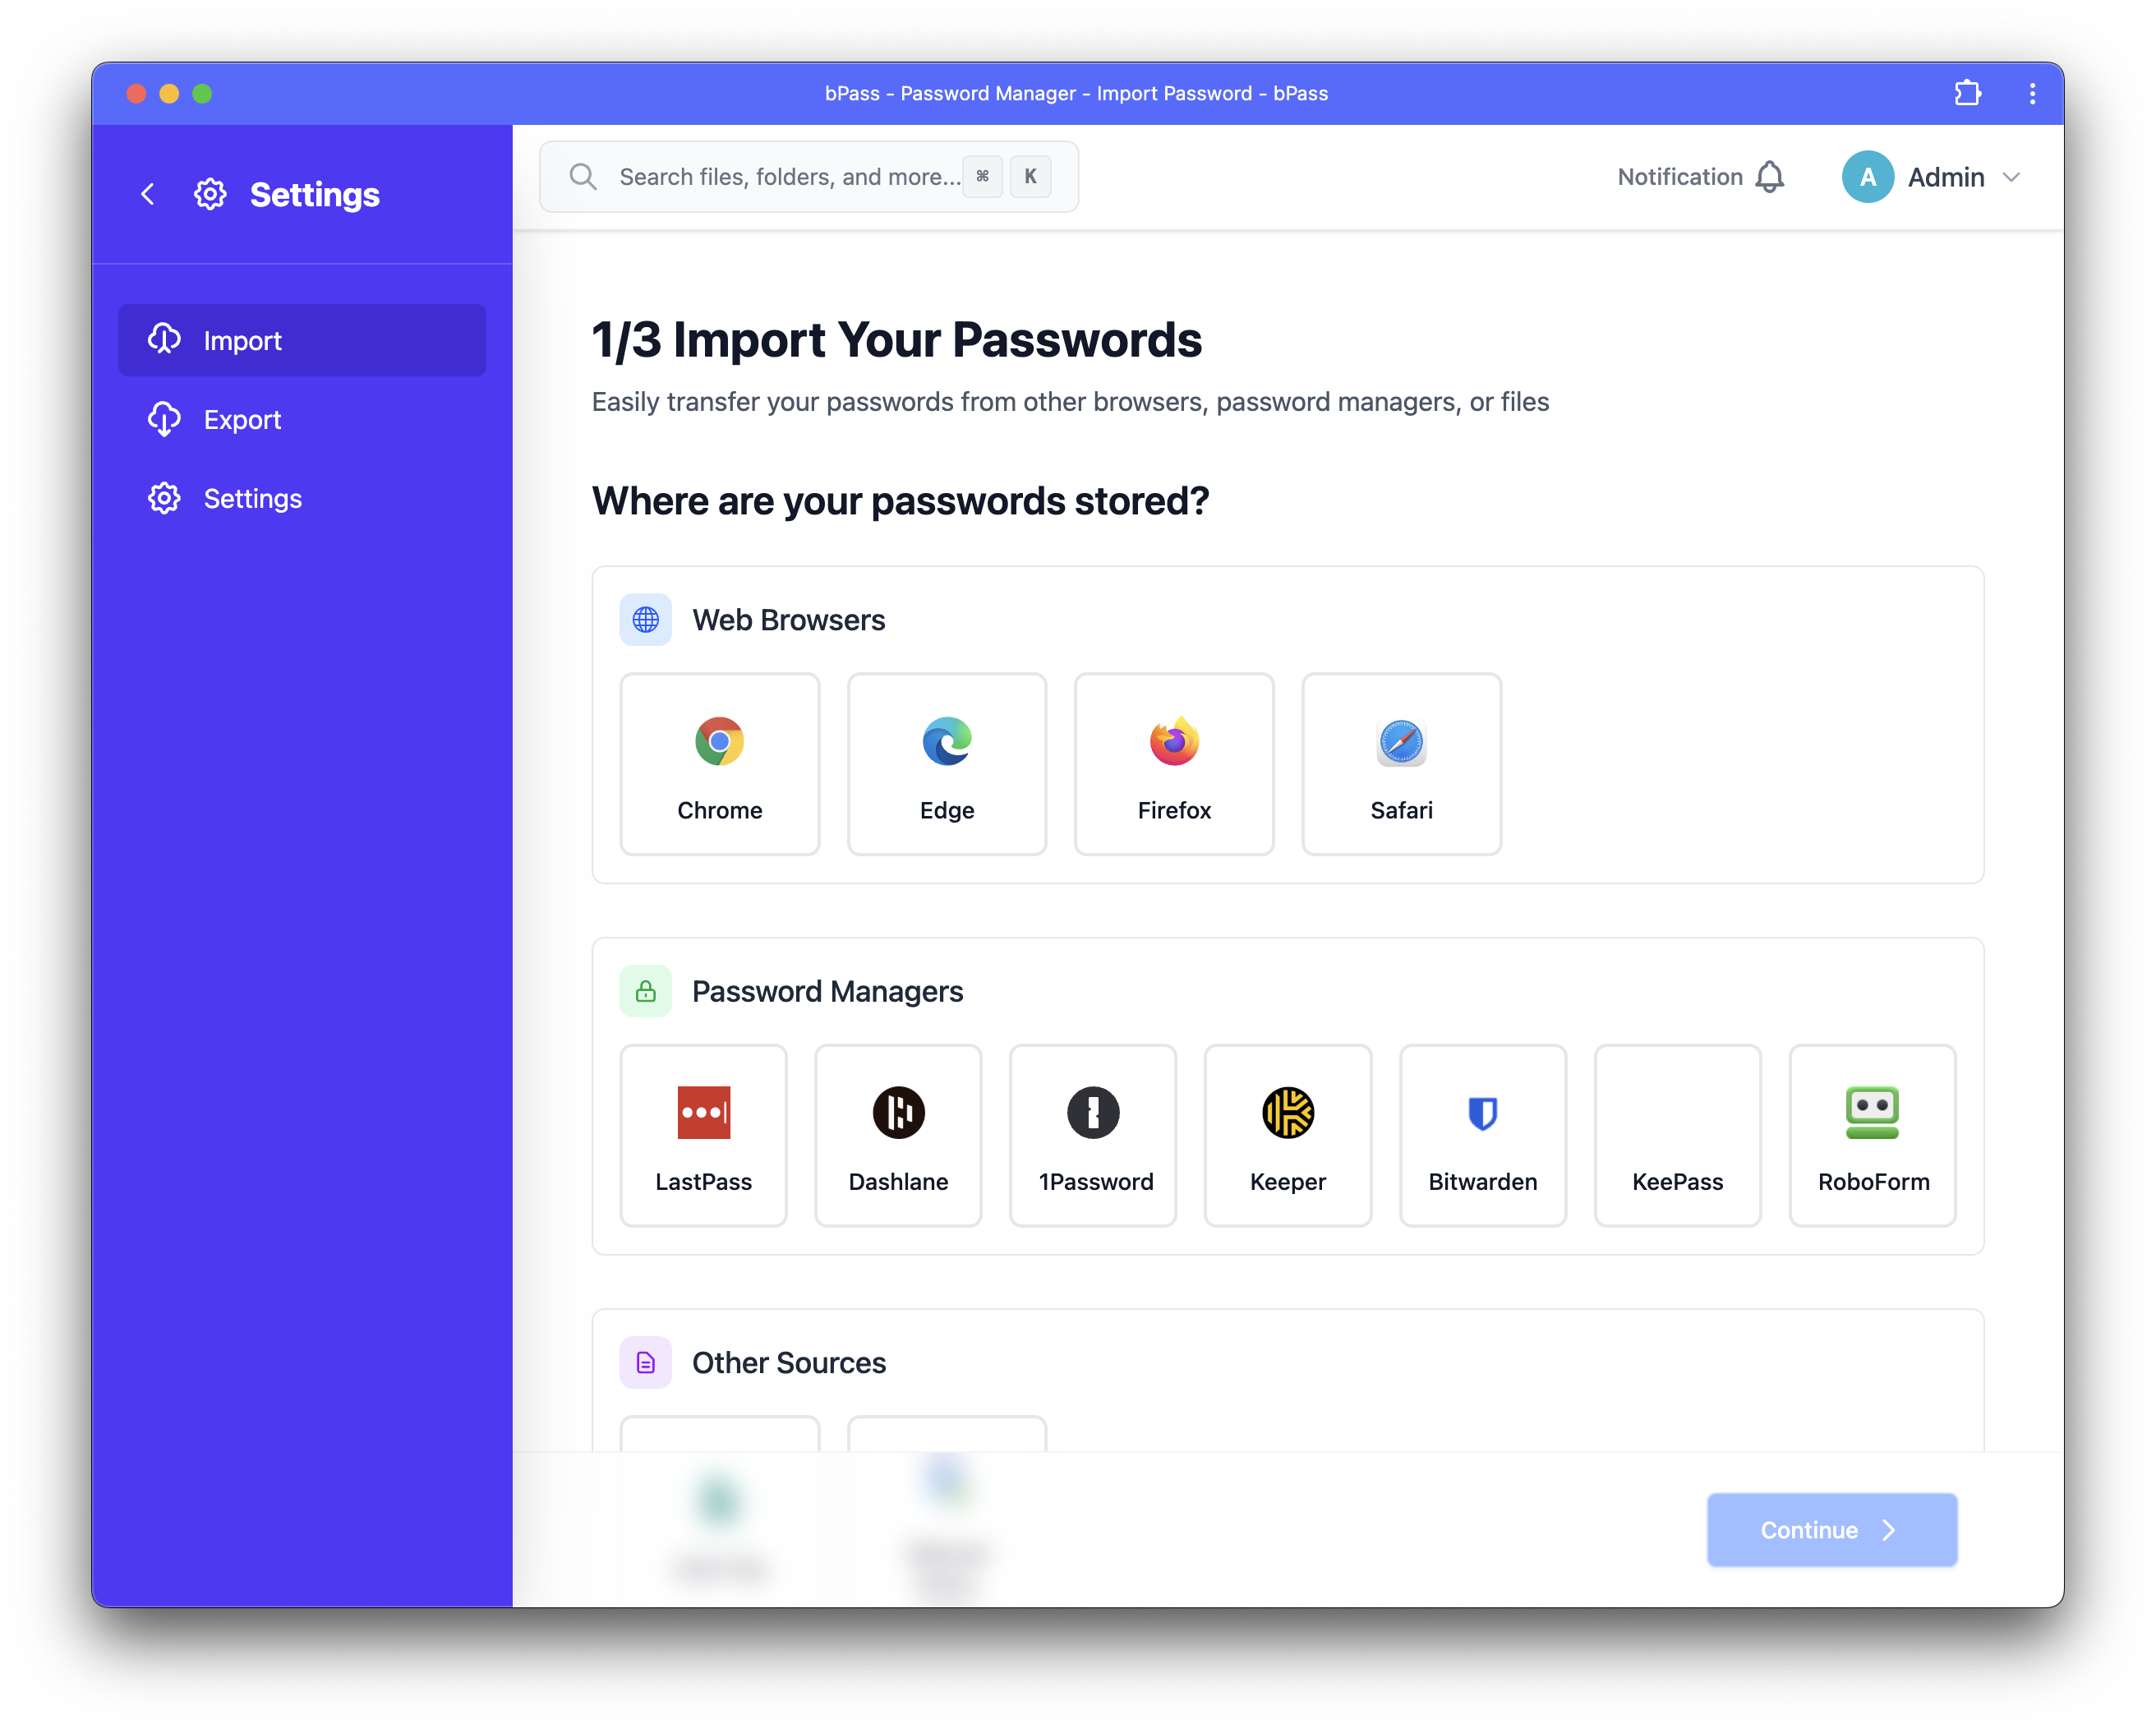
- LastPass - CSV export format
- Bitwarden - JSON and CSV exports
- 1Password - 1PIF and CSV formats
- Dashlane - CSV export
- Keeper - CSV export
- KeePass - CSV export
- RoboForm - CSV export
- Chrome Password Manager - CSV export
- Other Managers - Generic CSV format
Browsers
Import saved passwords from major browsers:
- Google Chrome - Exported passwords CSV
- Mozilla Firefox - CSV export
- Microsoft Edge - CSV export
- Safari - Keychain export (macOS)
- Opera - CSV export
Custom Formats
- CSV Files - Custom spreadsheet formats
- Excel Files - .xlsx and .xls formats
- JSON Files - Structured data imports
- Manual Entry - Guided entry for small datasets
How to Import Data
Step 1: Access Import Tool
- Navigate to Settings from the main dashboard
- Click on "Import Data" in the settings menu
- Choose your import source from the available options
Step 2: Prepare Your Data
LastPass Export
- Log into LastPass web vault
- Go to More Options → Advanced → Export
- Select "LastPass CSV Format"
- Enter your master password
- Save the CSV file to your computer
Bitwarden Export
- Open Bitwarden web vault
- Go to Tools → Export
- Choose CSV format
- Enter your master password
- Download the export file
1Password Export
- Open 1Password desktop app
- Select items to export
- Go to File → Export
- Choose CSV format
- Save the export file
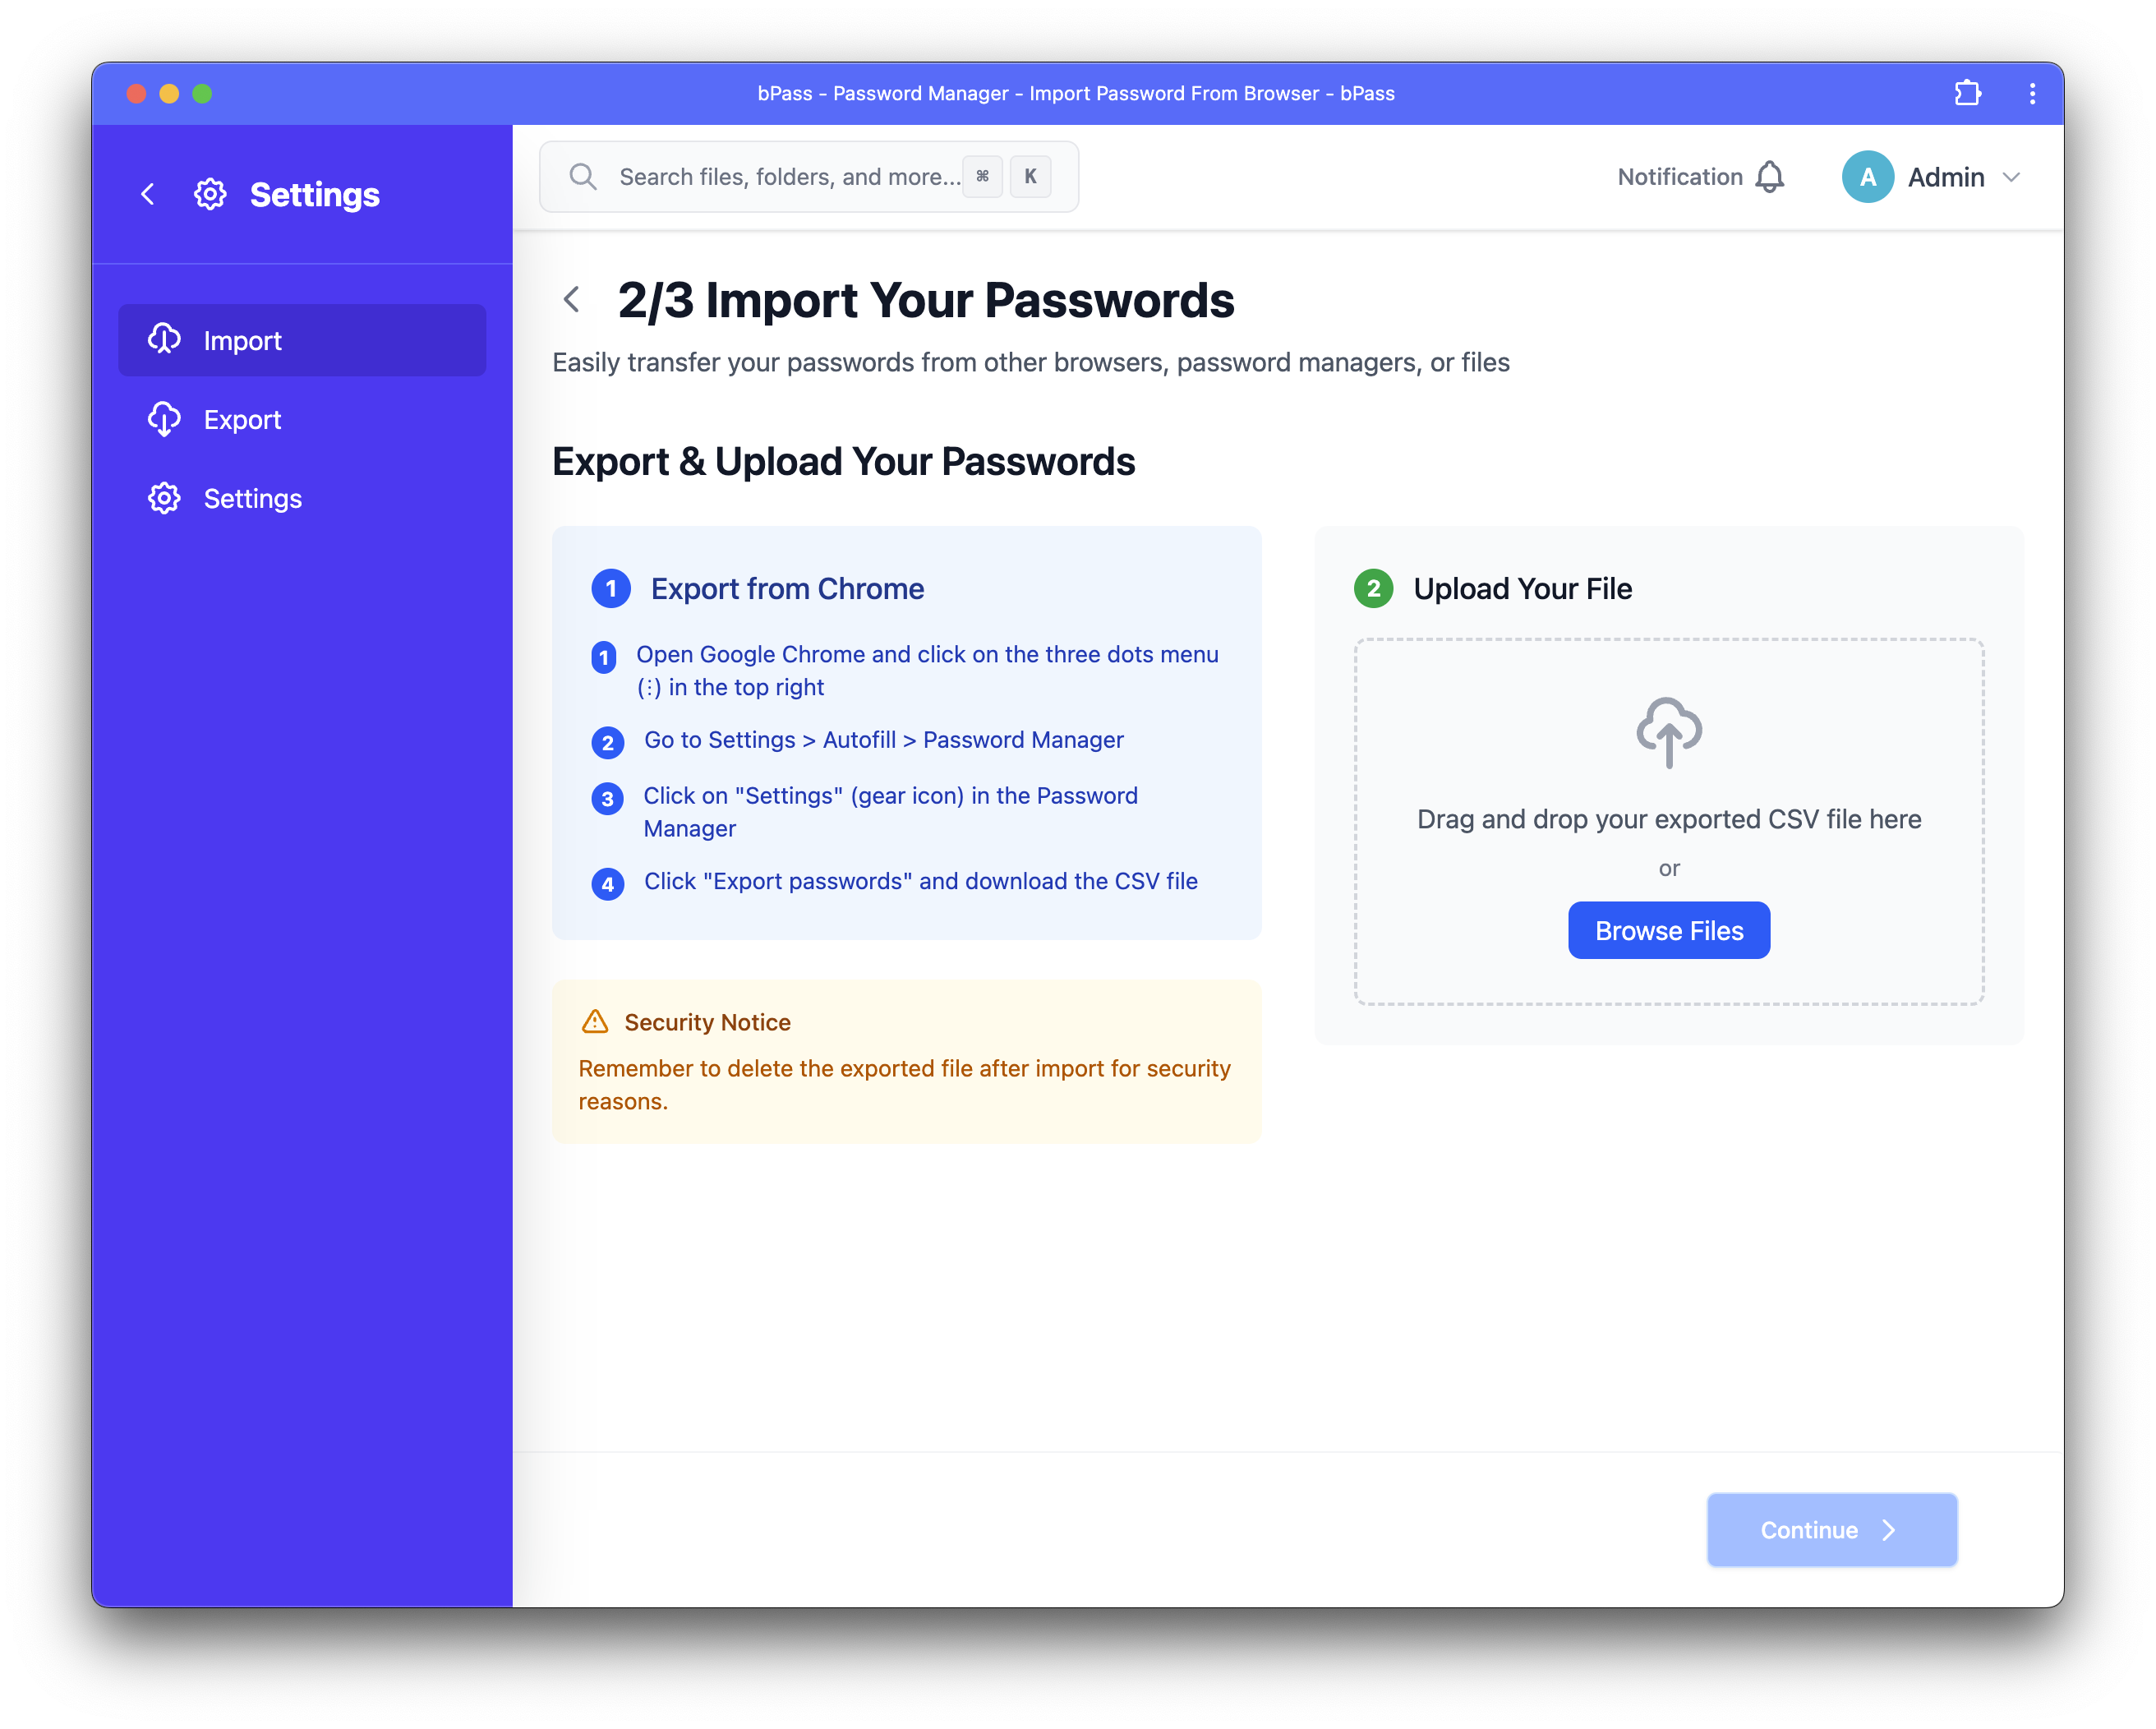
Chrome Export
- Open Chrome and go to Settings
- Navigate to Privacy and Security → Passwords
- Click the ⋮ menu next to "Saved Passwords"
- Select "Export passwords"
- Authenticate and save the CSV file
Firefox Export
- Open Firefox and go to about:logins
- Click the ⋮ menu in the top right
- Select "Export Logins"
- Save the CSV file to your computer
Edge Export
- Open Edge and go to Settings
- Navigate to Profiles → Passwords
- Click "Export passwords"
- Authenticate and save the CSV file
Create a CSV file with these columns:
| Column | Description | Required |
|---|---|---|
title |
Entry name/title | Yes |
url |
Website URL | No |
username |
Username/email | No |
password |
Password | No |
notes |
Additional notes | No |
folder |
Folder name | No |
tags |
Comma-separated tags | No |
Example CSV:
Step 3: Upload and Review
- Select File - Choose your export file to upload
- Map Fields - Review automatic field mapping
- Preview Data - Check that data looks correct
- Choose Options:
- Skip duplicates
- Merge duplicates
- Create new folder for imports
- Apply tags to imported entries

Import Options & Settings
Duplicate Handling
Choose how to handle duplicate entries:
- Skip Duplicates - Don't import entries that already exist
- Merge Duplicates - Combine information from duplicate entries
- Import All - Create separate entries for all duplicates
- Ask Each Time - Prompt for each duplicate found
Organization Options
Structure your imported data:
- Create Import Folder - Put all imports in a dedicated folder
- Preserve Folders - Maintain original folder structure
- Apply Tags - Add tags to all imported entries
- Set Entry Type - Choose default entry type for imports
Security Options
Configure security during import:
- Encrypt Immediately - Encrypt data during upload
- Secure Upload - Use encrypted transmission
- Clear Clipboard - Clear any copied passwords
- Generate Report - Create import audit report
Best Practices
Before Import
- Clean Source Data - Remove unnecessary entries from source
- Organize Structure - Plan your folder organization
- Backup Source - Keep a backup of original export
- Test Small Batch - Try importing a few entries first
- Review Security - Ensure secure environment for import
During Import
- Monitor Progress - Watch for errors or issues
- Review Mapping - Verify field mapping is correct
- Check Duplicates - Handle duplicates appropriately
- Validate Data - Spot-check imported entries
- Note Issues - Record any problems for later resolution
After Import
- Verify Data - Check that all important data imported correctly
- Test Auto-Fill - Verify browser extension works with new entries
- Update Passwords - Replace weak or reused passwords
- Organize Structure - Clean up folders and organization
- Delete Source - Securely delete original export files
Ready to migrate your data? Start with the import tool in your Settings or contact support if you need assistance with complex migrations.